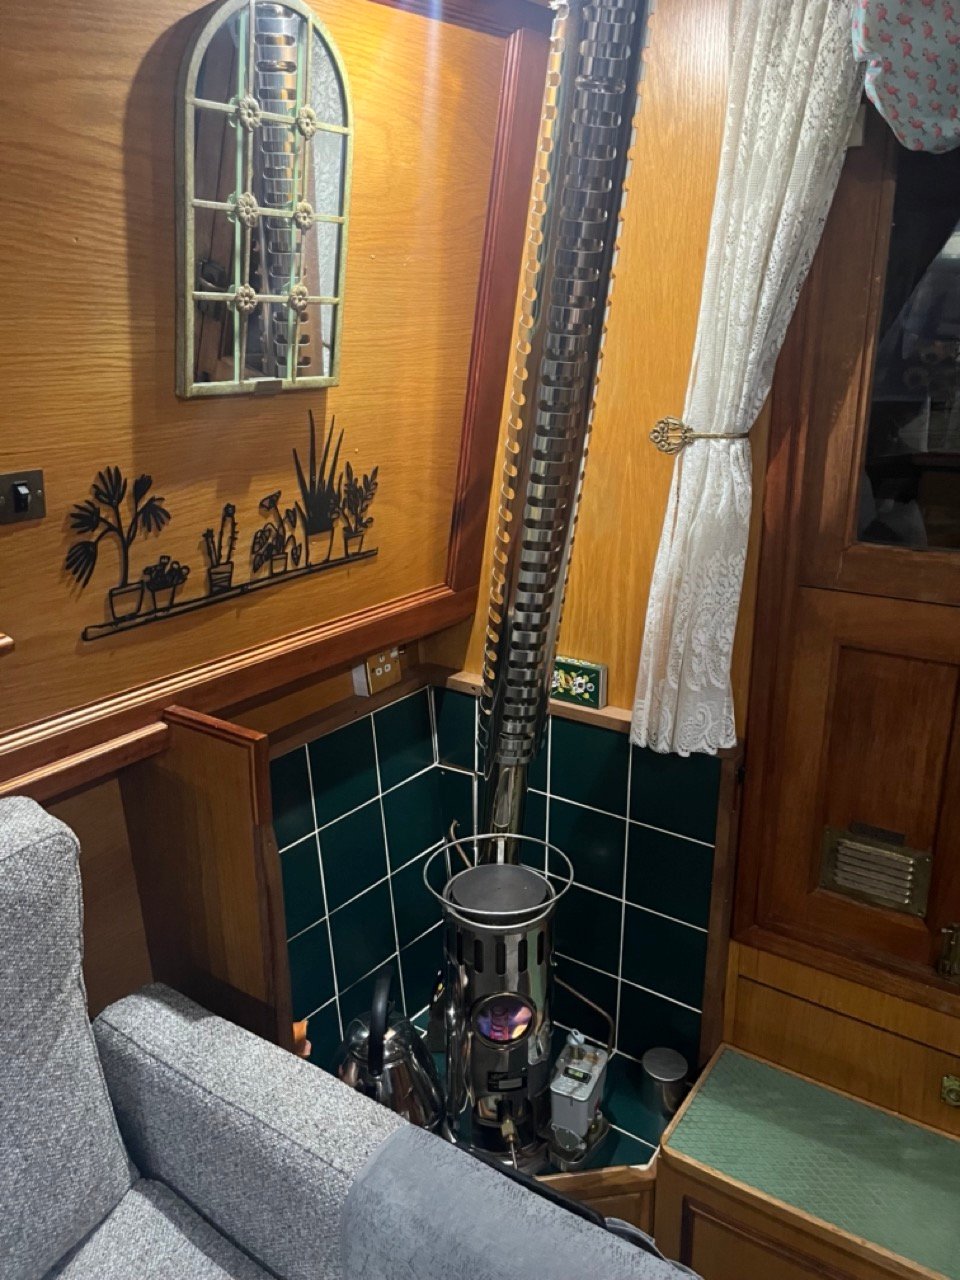
How we installed a Refleks 66 Mk aboard Rasmunda, why we chose the smallest model, and what it really costs to keep our 60-foot narrowboat warm through winter.
When you live aboard a narrowboat all year round, heating isn’t something you can afford to get wrong.
You need a system that’s reliable, economical to run and, perhaps most importantly, capable of keeping you comfortable without turning the boat into a sauna.
And believe me, we’ve experienced the sauna!
When we bought Rasmunda, our 60-foot narrowboat, she already had an Eberspacher diesel central heating system connected to six radiators. It worked perfectly well, but I wanted something that could provide steady background heat throughout winter without constantly running the Eberspacher.
Having lived aboard boats for many years, I knew exactly what type of heater I wanted: a diesel drip-feed stove.
After quite a bit of research, we settled on the compact Refleks 66 Mk.
Here’s why we chose it, how I installed it, and what we’ve discovered about its performance and running costs after living with it through winter.
Three Boats, Three Diesel Heaters, and One Very Hot Night!
My experience with diesel drip-feed heaters goes back a long way.
We had a Taylor’s 079D diesel heater aboard Ruffles Spray, the steel sailing yacht we built ourselves before heading off to the Mediterranean.
Later, aboard Wright Away, we had a Bubble Stove.
Both gave us plenty of experience with this type of heating, although the Bubble taught us a particularly memorable lesson.
Our first night aboard Wright Away was in early December 2024.
Naturally, Ann was convinced we were going to freeze. She arrived armed with two enormous 15-tog quilts, determined that we wouldn’t spend our first night shivering.
We lit the Bubble Stove for the first time that afternoon.
It was wonderful. The boat gradually warmed up, and by the evening everything felt lovely and cosy. We went to bed feeling rather pleased with ourselves.
Then came one o’clock in the morning.
We were practically being roasted alive!
Even on its lowest setting, the Bubble was producing an astonishing amount of heat. Forget the two 15-tog quilts. We ended up sleeping under nothing more than a quilt cover.
At times, we even had to open the front doors to let some of the heat escape.
Not quite the freezing winter night we’d prepared for!
The Bubble was the smallest model available, but for our needs it was simply too powerful.
So when it came to choosing a stove for Rasmunda, I knew one thing for certain.
Bigger definitely wasn’t going to be better.
Why We Chose the Refleks 66 Mk
There were several reasons for choosing the Refleks, but the two most important were its physical dimensions and diesel consumption.
The Taylor’s 079D I’d previously used was a bulkhead-mounted heater, which wasn’t the arrangement I wanted for Rasmunda.
The Bubble was too large and, based on our experience aboard Wright Away, produced more heat than we needed.
Rasmunda also presented another challenge: space.
There was only a limited area available in the saloon where a stove could be installed, and I didn’t want the heating system dictating the entire layout of the boat.
After researching the Refleks range, the small 66 Mk looked ideal.
It offered a compact installation and a relatively low minimum fuel consumption, making it suitable for continuous winter operation.
But there was another important consideration.
We Didn’t Need to Heat the Entire Boat
Rasmunda already had an Eberspacher connected to six radiators.
My intention was never to replace that system.
Instead, I worked out that the Refleks should provide enough heat for the saloon and dinette area, leaving the Eberspacher to heat the bathroom and bedroom when required.
Larger Refleks models were available with back-boiler options, which could potentially have supplied the radiator circuit.
But that would have meant considerably more expense and the complicated job of integrating another heat source into the existing Eberspacher heating system.
Frankly, it wasn’t a project I wanted or needed.
The smaller Refleks would be a standalone heater, operating continuously during the colder winter months and lit only when required during milder weather.
It seemed the sensible solution.
Making Room for the Refleks Stove
Choosing the stove was one thing. Finding somewhere to put it was another.
Rasmunda’s original saloon had an L-shaped seating arrangement running along the side of the boat, with a wooden cupboard in the forward corner.
We decided to remove the entire seating arrangement and the cupboard, completely changing the layout of the saloon.
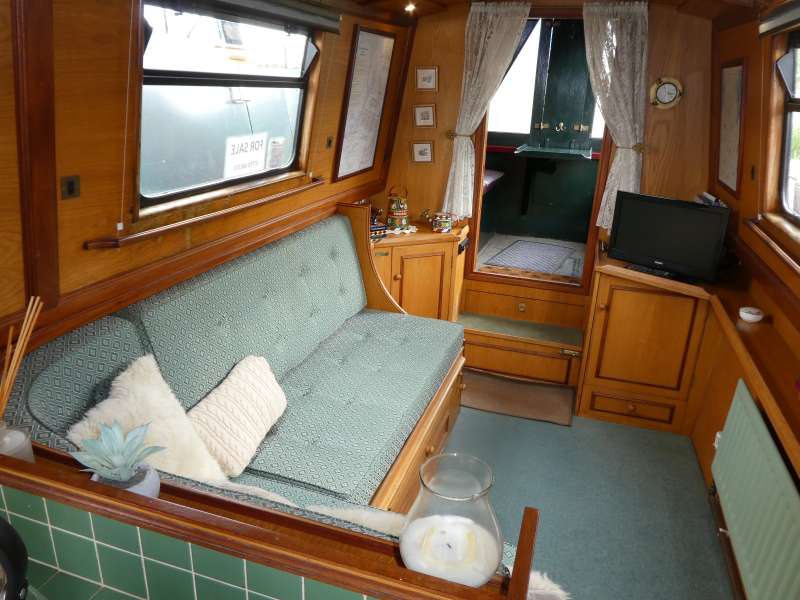
This gave me the opportunity to create a dedicated space for the Refleks 66 Mk.
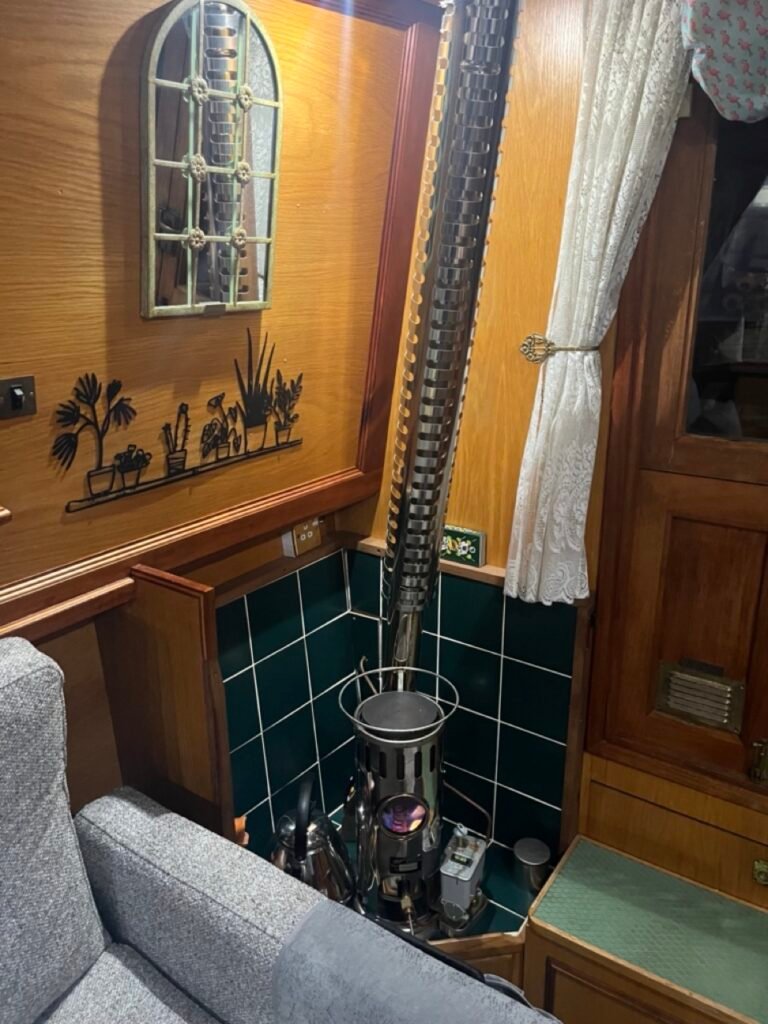
I built a new hearth and tiled surround in the corner, with the stove’s stainless-steel flue running vertically through the roof.
The compact size of the Refleks was particularly important here. I wanted a proper diesel stove without sacrificing too much of our living space.
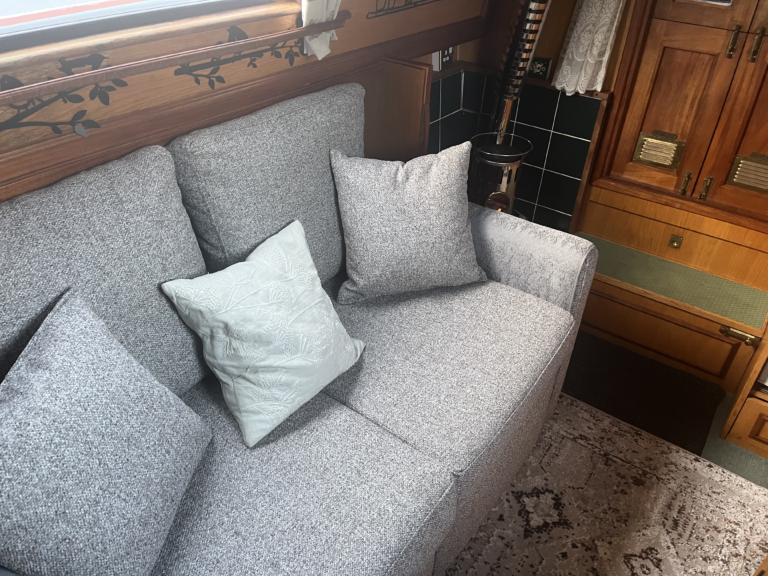
We subsequently fitted a new grey sofa, which has made the saloon considerably more comfortable.
Looking at the finished result, the Refleks fits neatly into its corner, and the whole arrangement works exactly as we’d hoped.
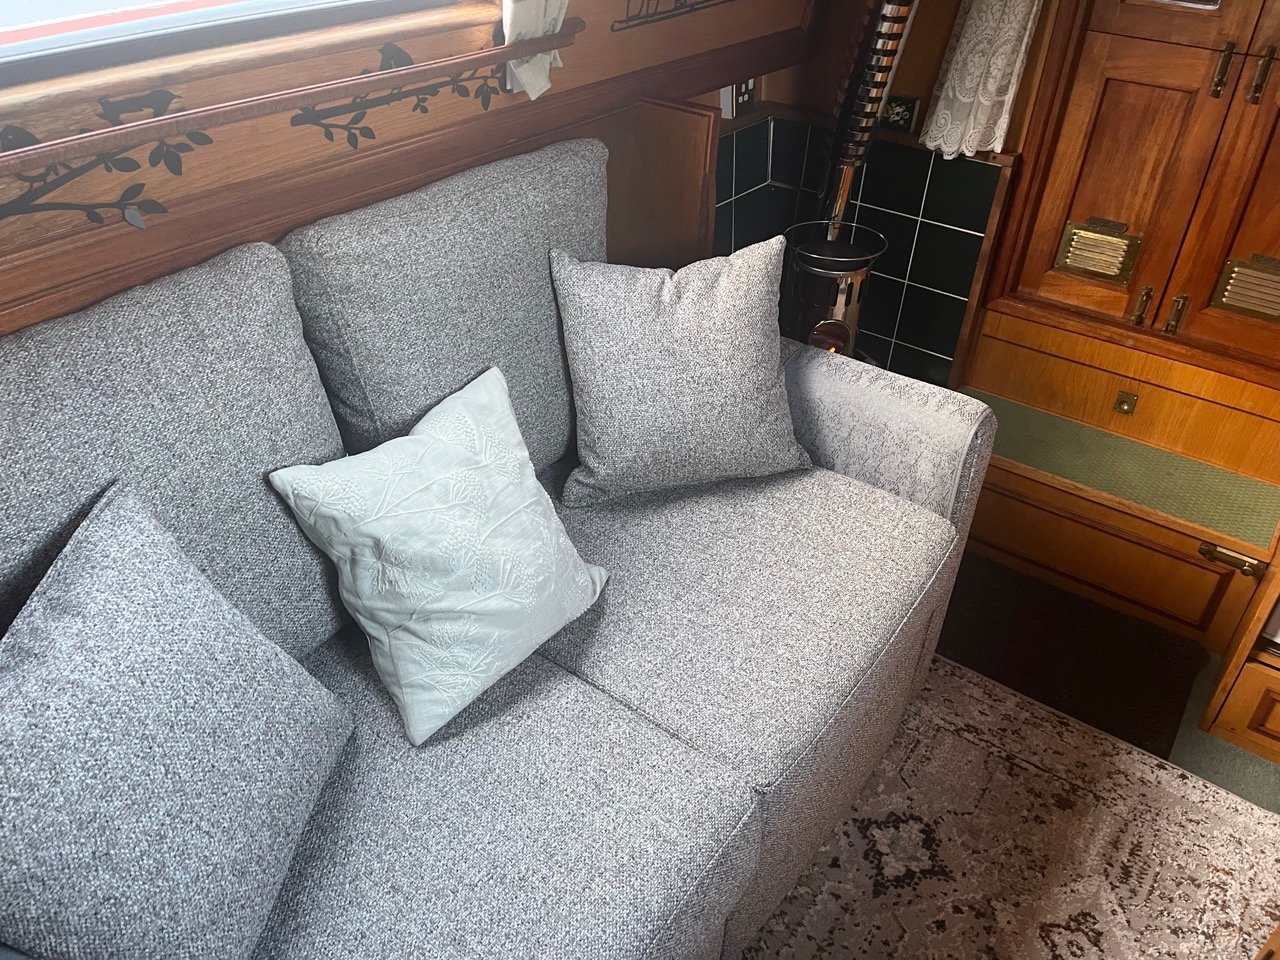
Suggested photograph: The completed Refleks installation with the new grey sofa.
Installing the Stove Myself
I carried out the installation myself, including the saloon modifications, hearth, flue arrangement and fuel supply.
Having built Ruffles Spray and worked on boat systems for many years, I was comfortable undertaking the work.
However, installing a diesel stove is not simply a matter of cutting a hole in the roof and connecting a fuel pipe.
Correct clearances from combustible materials, suitable hearth construction, flue installation, ventilation and fuel-system safety are essential.
Anyone considering a similar installation should follow the relevant manufacturer’s instructions and applicable marine safety requirements, and obtain competent professional assistance where necessary.
Choosing a Tek-Tanks Diesel Tank
I decided to use a standard 106-litre plastic diesel tank from Tek-Tanks, but I wanted the fittings positioned to suit our particular installation.
I worked out where I needed the filler, breather, fuel take-off and inspection hatch, then sent Tek-Tanks a sketch showing my requirements.
They produced a detailed drawing incorporating the positions I’d specified. After checking everything, I signed off the drawing and they manufactured the tank with the fittings in the agreed positions.
The finished tank is a 106-litre MDPE plastic diesel tank, fitted with a 90 mm filler, breather connection, inspection hatch and valved fuel take-off.
I installed it in Rasmunda’s forward cratch area, beneath a removable wooden cover.
Although the tank itself was a standard model, having the fittings positioned where I wanted them made the installation much easier.
Suggested photograph: The dedicated tank installed in the cratch, with its wooden cover raised.
Why I Positioned the Fuel Take-Off Above the Tank Bottom
One small but deliberate feature of the design was the position of the fuel take-off.
Rather than placing it right at the bottom of the tank, I specified it approximately 50 mm above the tank floor.
The idea was to leave an area below the take-off where any water or sediment could settle rather than being drawn straight into the stove’s fuel supply.
I’d used the same principle when designing the diesel tanks for Ruffles Spray.
During all our years aboard, we never experienced problems with water or sludge accumulating in those tanks.
I’ve always liked plastic diesel tanks. They don’t suffer from internal rust, and in our experience they’ve proved extremely reliable.
Of course, plastic doesn’t make a tank immune to water contamination, but we’ve had excellent results with them.
Gravity Fed Diesel. No Electric Pump
From the tank, I ran an 8 mm copper fuel line to the Refleks.
The tank’s fuel take-off sits approximately 320 mm above the Toby fuel regulator, allowing the installation to operate as a gravity-fed system.
That means there’s no electric fuel pump required.
No pump noise, no additional electrical consumption and one less component to maintain.
The available fuel head naturally changes as the tank empties, so the tank position and fuel arrangement need to be suitable for the regulator’s operating requirements.
The 320 mm figure describes our particular installation, not a universal installation dimension.
Does the Refleks 66 Mk Heat a 60-Foot Narrowboat?
The short answer is yes — provided you understand what you’re asking it to do.
Our original calculation was that the Refleks would comfortably heat Rasmunda’s saloon and dinette.
After living with it through winter, I’m pleased to say that’s exactly what it does.
But there is one caveat.
If we leave the corridor door open towards the bathroom and bedroom, the little Refleks begins to struggle.
Warm air travels farther down the boat, and the stove can’t maintain quite the same temperature in the main living area.
That wasn’t a surprise. I’d anticipated it when choosing the smaller model.
We simply use the Eberspacher to provide additional heat where it’s needed.
How We Heat Rasmunda in Winter
As I write this, outside temperatures are around 6–12°C.
Under those conditions, we leave the Refleks running continuously, 24 hours a day.
In the morning, our Baomain programmable timer automatically starts the Eberspacher, which runs for two hours.
The timer also starts the Eberspacher for another two-hour heating period in the evening.
We retained the original Eberspacher EasyStart controller as well, so we can start the heater manually whenever we need extra warmth or hot water. It’s straightforward: press the button, select how many minutes we want it to run, confirm the setting, and the Eberspacher starts.
That gives us the best of both worlds: automatic heating at our usual times and the flexibility to switch it on whenever we want.
The Eberspacher heats the radiators and our domestic hot water, while the Refleks provides steady background warmth in the saloon and dinette.
When temperatures drop below freezing, we simply run the Eberspacher for longer.
This arrangement works well for us because we don’t particularly want the bedroom to be roasting hot.
We prefer a comfortable living area and a cooler bedroom.
And, after our experience aboard Wright Away, we’re certainly not keen to repeat the tropical conditions!
Related reading: How a £520 Narrowboat Hot Water Upgrade Turned Into a £14.59 Timer – Part 1
How Much Diesel Does a Refleks 66 Mk Use?
This is probably the question most people considering a diesel stove want answered.
The Toby regulator on our Refleks 66 Mk is set to deliver approximately 2 cubic centimetres of diesel per minute at its lowest setting.
That works out at:
2 cc × 60 minutes × 24 hours = 2,880 cc
Or 2.88 litres per 24 hours.
Our actual fuel measurements have been reasonably close to that figure.
For everyday budgeting, I now work on 3 litres per day when the stove is running continuously on its lowest setting.
When temperatures drop below freezing and we turn the stove up, I budget around 4 litres per day.
In particularly severe weather, with temperatures falling to around −5°C to −8°C or lower, I allow for as much as 5 litres per day.
These higher figures are planning allowances rather than laboratory measurements, but they give us a sensible way of estimating our winter heating costs.
Our Actual Refleks Running Costs
At the time of writing, we’re paying approximately £1.63 per litre for diesel.
| Conditions | Diesel per 24 hours | Daily cost | 30-day cost |
|---|---|---|---|
| Normal winter | 3 litres | £4.89 | £146.70 |
| Sub-zero weather | 4 litres | £6.52 | £195.60 |
| Severe cold | 5 litres | £8.15 | £244.50 |
These figures assume the stove operates continuously for 24 hours a day.
They don’t include the additional diesel used by the Eberspacher central heating.
At almost £150 for a 30-day period of normal winter operation, the Refleks certainly isn’t free to run.
But what it provides is continuous, steady warmth without requiring an electric circulation pump or repeatedly starting and stopping a diesel-fired central heating system.
For us, that comfort is worth a great deal.
How Long Does a 106-Litre Tank Last?
With our dedicated 106-litre diesel tank, the theoretical running times are:
| Daily consumption | Theoretical running time |
|---|---|
| 3 litres | 35.3 days |
| 4 litres | 26.5 days |
| 5 litres | 21.2 days |
In practice, the usable capacity is lower because the fuel take-off sits above the tank bottom, and we naturally refill before running the tank empty.
Nevertheless, having a dedicated fuel supply gives us plenty of flexibility during winter.
How Much Did the Refleks Installation Cost?
Installing a diesel stove isn’t particularly cheap, especially when you’re starting from scratch.
Here’s what our installation cost approximately:
| Item | Cost |
|---|---|
| Refleks 66 Mk stove | £1,800 |
| Complete flue kit | £450 |
| Tek-Tanks 106-litre tank with specified fittings | £401 |
| Copper fuel line and fittings | £60 |
| Hearth, tiles and surrounding materials | £200 |
| Total | £2,911 |
So the complete installation came to approximately £2,900.
That doesn’t include my labour.
I removed the original L-shaped seating and corner cupboard, built the hearth and tiled surround, installed the stove and flue, designed and fitted the tank, and ran the fuel line myself.
Paying someone to undertake all that work would obviously have increased the total considerably.
It’s a substantial initial investment, but we wanted a heating arrangement that would suit Rasmunda for years to come.
Maintaining Our Refleks Stove
One of the things I like about a drip-feed diesel stove is its relative simplicity.
There isn’t a great deal to go wrong, although regular maintenance is still important.
During winter, I generally leave the Refleks running continuously.
Approximately once a month, I choose a sunny day to switch it off and give it a clean.
Why a sunny day?
Well, the sunshine coming through the windows provides a little warmth, and psychologically it somehow doesn’t feel quite so cold when the sun is shining!
Once the stove has cooled completely, I usually find a small amount of carbon around the point where the diesel enters the burner pot.
I carefully remove this, check the holes around the burner and clean the central burner component with its spring.
I also attend to the Toby regulator, isolating the fuel supply before carrying out the appropriate filter-cleaning and servicing procedure.
Once everything is reassembled and checked, I relight the stove.
The Refleks has burned very cleanly for us, without significant soot buildup.
Naturally, anyone servicing a stove or fuel regulator should follow the relevant manufacturer’s instructions, including the correct procedures for isolating fuel, dismantling components, reassembly and leak checking.
What About the Yellow Flame?
Something else I’ve noticed is that the Refleks can burn with a slightly yellow flame, that’s wasn’t the case with the Taylors.
Ours has done so during normal operation, and we’ve had no significant soot problems.
However, flame appearance alone isn’t a reliable indication that a stove is operating safely.
Excessive yellow or smoky flames, soot accumulation, unusual smells or changes in combustion should always be investigated against the manufacturer’s guidance.
We also have a working carbon monoxide alarm aboard Rasmunda, which is essential whenever you’re using fuel-burning appliances in an enclosed space.
Would We Choose the Refleks 66 Mk Again?
Yes, absolutely.
But I’d add an important qualification.
You need to choose a stove that suits the size of the area you actually want to heat.
Our experience aboard Wright Away demonstrated that even the smallest model in one manufacturer’s range can produce far more heat than you need.
With Rasmunda, I deliberately chose a smaller stove because we already had Eberspacher central heating.
The Refleks was never intended to heat every corner of the boat.
Its job was to provide comfortable, continuous warmth in the saloon and dinette, without consuming excessive amounts of diesel.
And that’s exactly what it does.
The dedicated gravity-fed fuel system works well, maintenance has been straightforward, and we know approximately how much diesel to budget for different winter conditions.
Would I install a larger stove with a back boiler instead?
Not for Rasmunda.
The extra expense, space requirements and complexity of connecting it into the existing radiator circuit simply wouldn’t be justified for our needs.
Our two heating systems complement one another.
The Refleks provides the steady warmth, while the Eberspacher looks after the cooler parts of the boat and our hot water.
And perhaps best of all, we no longer need to open the front doors in the middle of a December night because we’re being roasted alive!
Although I suspect Ann will still keep those 15-tog quilts handy, just in case.
This article describes our own installation and experience aboard Rasmunda. Diesel heating appliances, fuel tanks, fuel lines, flues and ventilation must be installed and maintained in accordance with the relevant manufacturers’ requirements and applicable boat safety standards. It is not intended as a substitute for professional installation or servicing guidance.